Easy Steps To Setting Up A Photo Backdrop
Recently, we added a new photo backdrop to our studio for spring sessions. The new addition—a light, wood paneled background—was a little bit different from our other previous wooded backgrounds. Instead of printing out a high resolution backdrop on paper, we wanted to try an actual wooden panel instead and we were happy with how easy it was to put together! Follow our steps below on how you can set up your own photo backdrop.
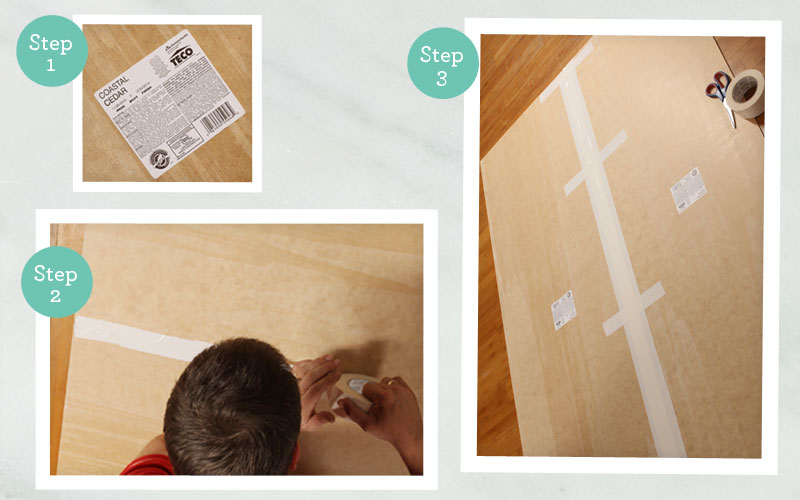
Step 1. We headed to our local Lowes to look at what options they had for wood panels. And let me tell you, living in New York, it’s always an adventure on transporting things that are bigger than a box. We don’t have a car but we had my mom’s car for the day, and we decided to head to Lowe’s. We decided on a light, cedar wood for our backdrop. We bought 3 panels in 4×8.
Step 2. We brought back the materials to our photo studio and laid out the pieces next to each other, one on top of the other so we could scotch tape the panels together.
Step 3. To make sure the panels were secure, we ran the tape over the middle (insert how many times—3? 4?). We also ran extra strips of tape along the edge of the board and spaced across the width for support. You can add as much tape as you want, use your judgement on whether or not if the panels are secure.
Step 4. Once the panels were secured by tape, the next thing to do was hang up the wooden panel for the backdrop. Make sure it’s aligned correctly (and level) and secure the corners with finishing nails that we previously had leftovers from a furniture project. Repeat for each panel until you reach the height that you want for the backdrop.
Step 5. For the bottom flooring, we moved the last of the panels to align in front of the backdrop. You can use double-sided tape to secure the flooring if you want to make sure it stays in place, but we opted to not do it as the panel was heavy enough and stayed in place even with movement. The true step 5, however, is setting up the perfect boudoir shot like my husband Pete is doing. Fabulous, right?
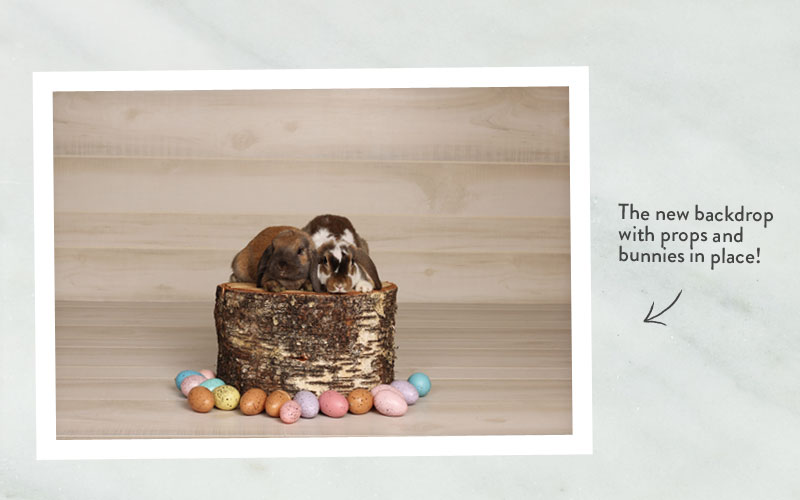
Step 6. The new backdrop is ready for a test shot! We brought out our new wooden stump prop and our new bunnies, Mr. Cuddles and Cookie Dough, to do a test run with Pete acting as our animal handler.
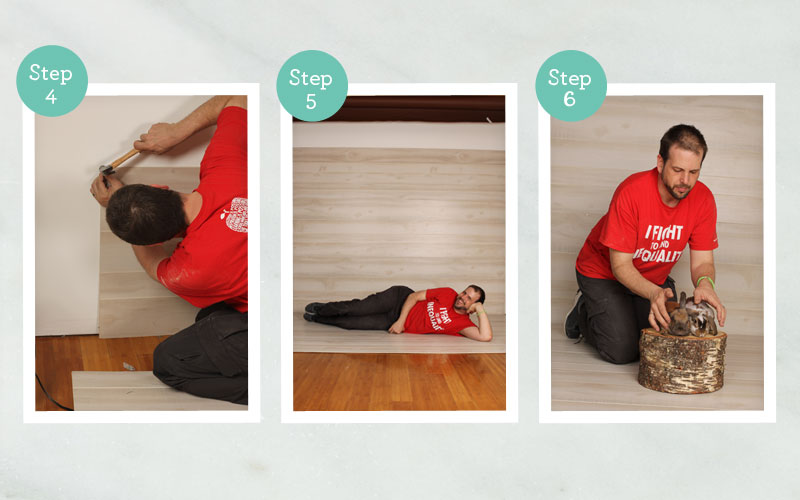
You can see how it all came together in the photo below. See how the colors pop against the cedar? We’re satisfied with how the new photo backdrop came out and how easy it was to set up!
